docs
https://firebase.google.com/docs/cloud-messaging?hl=ko
이번에 FCM(Firebase 클라우드 메시징)을 통하여 모바일앱 푸시 알림을 보내는 기능을 만들었다. 예전에 대부분의 기업들이 모바일앱을 만드는 이유가 푸시 알림 때문이라고 배웠던 기억이 난다.
하루에도 핸드폰으로 수많은 푸시 알림 메시지를 받아보지만 이걸 어떻게 보낼까 생각해본 적은 없었다. 이에 대하여 살펴볼 수 있는 좋은 기회였다.
환경: 스프링부트 + 코틀린 환경에서 개발 중, 다른 언어로 작성된 서비스중인 프로젝트에서 이미 푸시 알림 기능을 사용하고 있음(즉 Firebase 프로젝트 이미 존재, 토큰 발급할 수 있는 클라이언트 앱 존재)
개요
Firebase docs에서 ‘클라우드 메시징’, ‘서버 환경’ 두 섹션을 주로 참고하였다. 그리고 구글링하여 다른 사람들의 예제들도 살펴보며 참고하였다.
키 생성
먼저 스프링부트 환경에서 Firebase Admin SDK를 사용하기 위해서는 인증정보가 포함된 json 파일이 필요하다.
Firebase 콘솔에서 프로젝트 설정 > 서비스 계정 > 자바 선택 후 새 비공개 키 생성을 하면 json 파일이 다운로드된다. 이 파일을 resources 하위 경로에 넣어두고 인증 정보로 SDK를 초기화 할 수 있다. 민감 정보이므로 gitignore로 관리하는 것이 권장된다.
스프링부트
라이브러리는 com.google.firebase:firebase-admin 을 사용하면 된다.
그리고 FirebaseApp을 초기화하는 코드는 다음과 같다.
FcmProperties에는 여러 민감정보나 하드코딩 값들을 넣어두고 불러와서 사용한다.
@Configuration
@EnableConfigurationProperties(FcmProperties::class)
class FcmConfig(
    private val properties: FcmProperties,
) {
    @Bean
    fun firebaseApp(): FirebaseApp {
        val resource = ClassPathResource(properties.serviceAccountKeyPath)
        val serviceAccount: InputStream = resource.inputStream

        val options = FirebaseOptions.builder()
            .setCredentials(GoogleCredentials.fromStream(serviceAccount))
            .build()

        return FirebaseApp.initializeApp(options)
    }
}
그리고 처음에는, 구글링하면 흔하게 나오는 예제 코드를 사용하여 다음과 같이 작성하였다.
    override fun sendPush(request: PushSendRequest): Int {
        val message = makeMessage(request)
        val restTemplate = RestTemplate()

        restTemplate.messageConverters.add(0, StringHttpMessageConverter(StandardCharsets.UTF_8))

        val headers = HttpHeaders()
        headers.contentType = MediaType.APPLICATION_JSON
        headers[properties.authorization] = "${properties.bearer} " + getAccessToken()

        val entity = HttpEntity(message, headers)

        println(entity)

        val apiUrl = "<https://fcm.googleapis.com/v1/projects/${properties.projectId}/messages:send>"
        val response = restTemplate.exchange(apiUrl, HttpMethod.POST, entity, String::class.java)

        println(response.statusCode)

        return if (response.statusCode == HttpStatus.OK) 1 else 0
    }

    @Throws(IOException::class)
    private fun getAccessToken(): String {
        val googleCredentials =
            GoogleCredentials
                .fromStream(ClassPathResource(properties.serviceAccountKeyPath).inputStream)
                .createScoped(listOf(properties.cloudPlatformScope))
        googleCredentials.refreshIfExpired()
        return googleCredentials.accessToken.tokenValue
    }

    @Throws(JsonProcessingException::class)
    private fun makeMessage(request: PushSendRequest): String {
        val objectMapper = jacksonObjectMapper()

        val fcmMessageDto =
            FcmMessageDto(
                validateOnly = false,
                message =
                    MessageDto(
                        token = request.token,
                        notification =
                            NotificationDto(
                                title = request.title,
                                body = request.body,
                            ),
                    ),
            )

        return objectMapper.writeValueAsString(fcmMessageDto)
    }
/**
 * FCM에 실제 전송될 데이터의 DTO
 */
data class FcmMessageDto(
    val validateOnly: Boolean,
    val message: MessageDto,
)

data class MessageDto(
    val token: String,
    val notification: NotificationDto,
)

data class NotificationDto(
    val title: String,
    val body: String,
)
메서드 실행 시 아래와 같은 형태로 구성되어 요청된다.
POST <https://fcm.googleapis.com/v1/projects/myproject-b5ae1/messages:send> HTTP/1.1

Content-Type: application/json
Authorization: Bearer ya29.ElqKBGN2Ri_Uz...HnS_uNreA

{
   "message":{
      "token":"bk3RNwTe3H0:CI2k_HHwgIpoDKCIZvvDMExUdFQ3P1...",
      "notification":{
        "body":"This is an FCM notification message!",
        "title":"FCM Message"
      }
   }
}
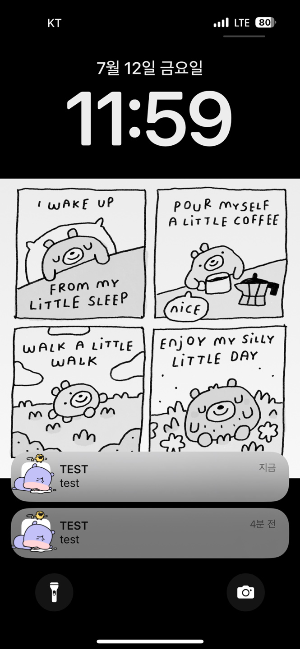
여기까지 작성하고 엔드포인트를 생성하여 함수를 호출해 테스트를 해보았을 때 푸시 알림이 잘 도착하였다.

그런데 다른 언어로 작성된 서비스 중인 프로젝트에서 푸시 알림 기능을 사용하는 곳을 보면 path를 url이라는 키로 보내주고 있었는데, 위 방식으로는 url을 어떻게 보내는지 몰라서 좀 헤맸다.
그렇게 docs를 뒤져보다가… 푸시 메시지 유형에 ‘알림 메시지’와 ‘데이터 메시지’ 두 가지가 있다는 것을 알게 되었다.
FCM을 통해 2가지 유형의 메시지를 클라이언트에 보낼 수 있습니다.
- 알림 메시지: 종종 '표시 메시지'로 간주됩니다. FCM SDK에서 자동으로 처리합니다.
- 데이터 메시지: 클라이언트 앱에서 처리합니다.
알림 메시지에는 사용자에게 표시되는 키 모음이 사전 정의되어 있습니다. 반면 데이터 메시지에는 사용자가 정의한 커스텀 키-값 쌍만 포함됩니다. 알림 메시지에 데이터 페이로드(선택사항)가 포함될 수 있습니다. 두 메시지 유형의 최대 페이로드는 4000바이트입니다. Firebase Console에서 메시지를 보내는 경우는 예외로 1,024자의 한도가 적용됩니다.
사용중인 서비스에서는 “url”을 데이터 메시지로 보내면 클라이언트 앱에서 데이터 메시지를 처리하는 방식을 사용하고 있었다는 것을 알게 되었다. 그 후 클라이언트 앱에서 데이터 메시지를 처리하는 방식으로 요청을 보내도록 리팩터링한 후 기능 구현을 마무리하였다.
'Log' 카테고리의 다른 글
| JIRA에 이슈 한번에 대량 등록하기 (1) | 2024.10.11 |
|---|---|
| [인프런 X VMware Tanzu] Spring Boot 밋업 with Josh Long 참석 후기 (1) | 2024.09.14 |
| 54회 SQLD 준비 + 시험 후기 (0) | 2024.08.25 |
| Nexus Repository 도입하기 (0) | 2024.06.27 |
| 방송통신대학교 컴퓨터과학과 3학년 1학기 편입 - 수강 과목 후기 (0) | 2024.06.09 |


